How to Create Invoices & Payment Links with nsave

This guide explains how to create compliant, professional invoices and share them as payment links with your clients — all within your nsave app.
Note: We recommend using the Invoice tool to get paid, as it helps ensure your transfers go smoothly.
Step-by-Step Guide
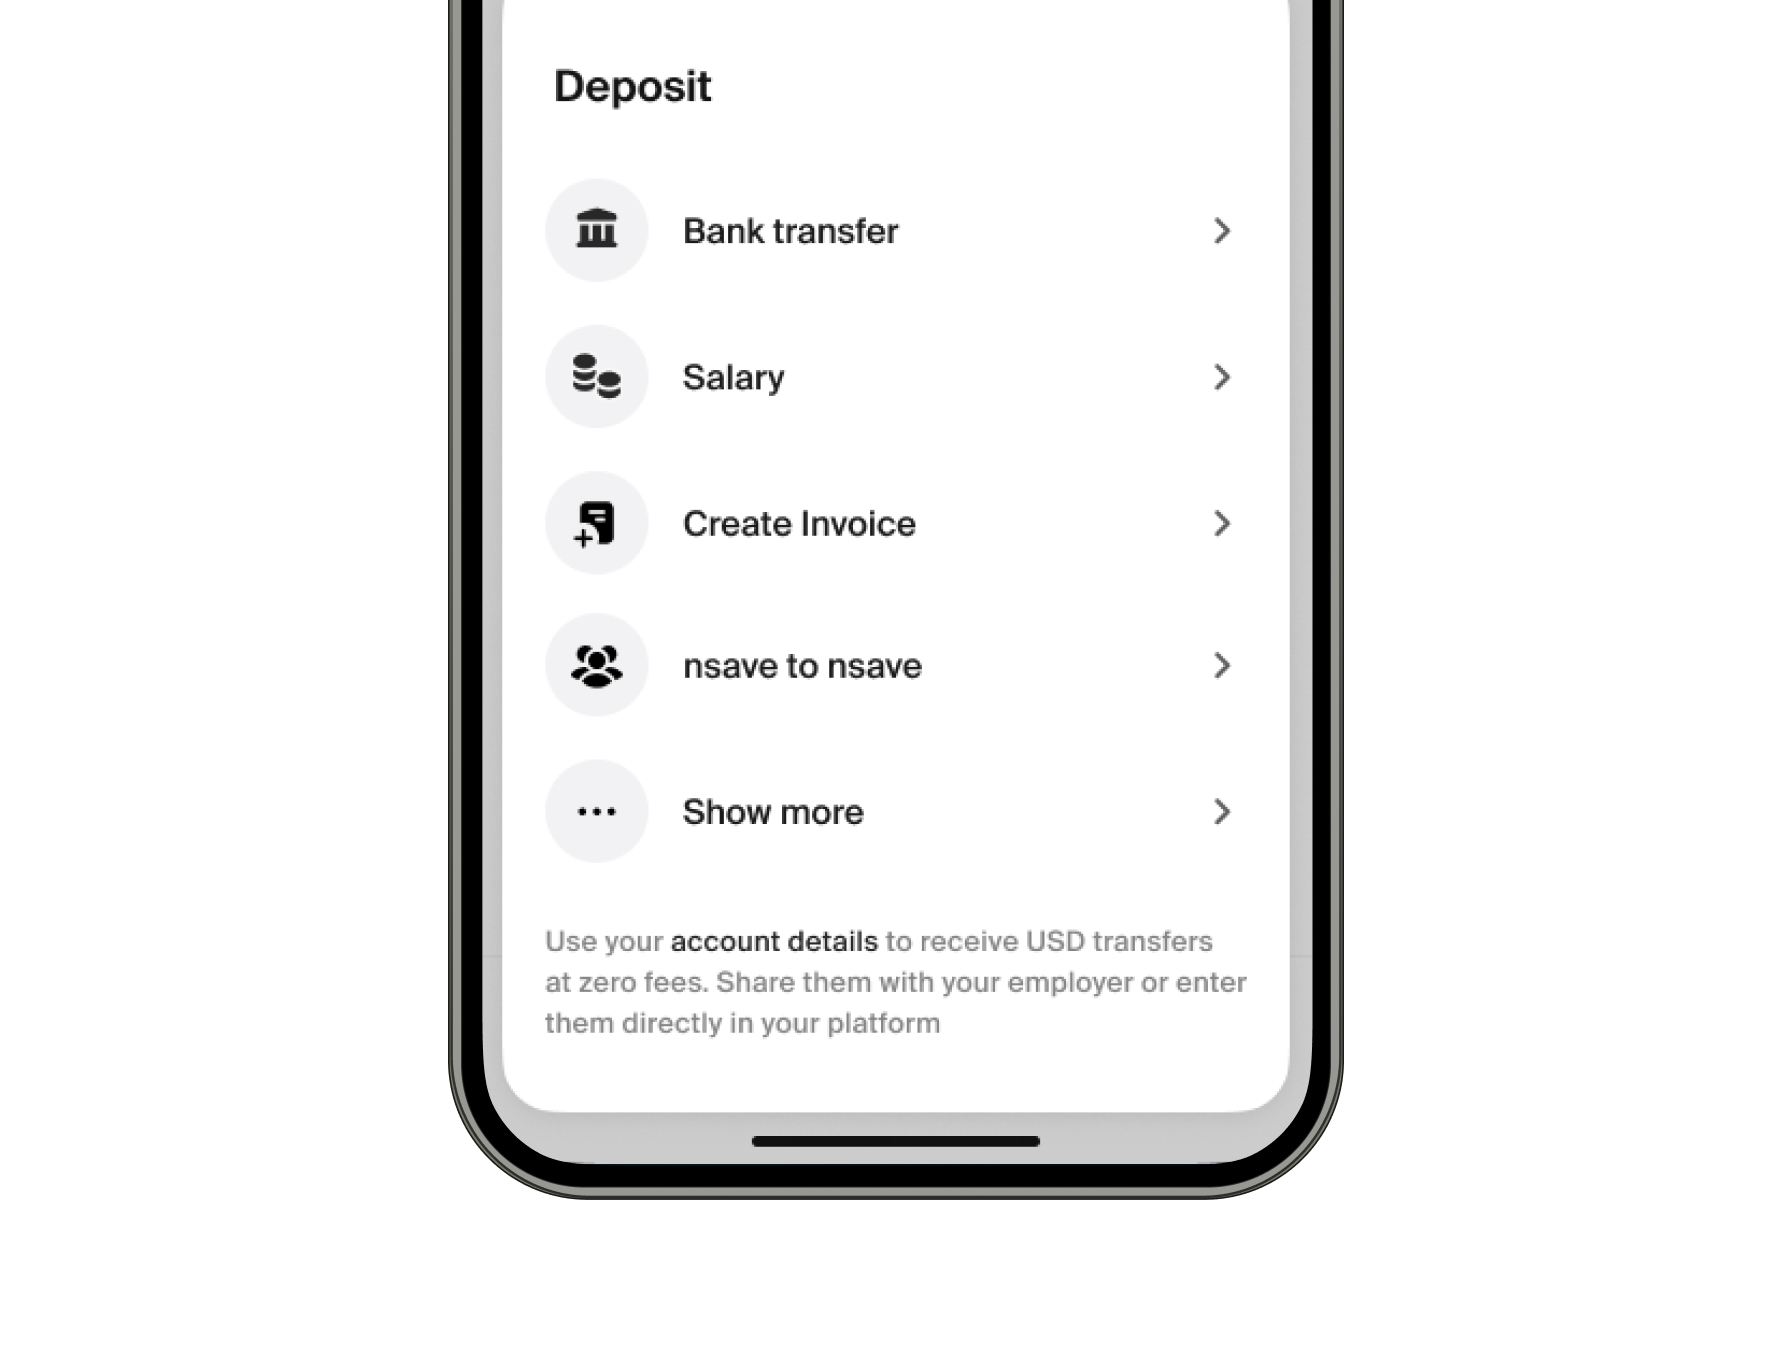
1. Start from “Deposit”
Click Deposit and select Create invoice.
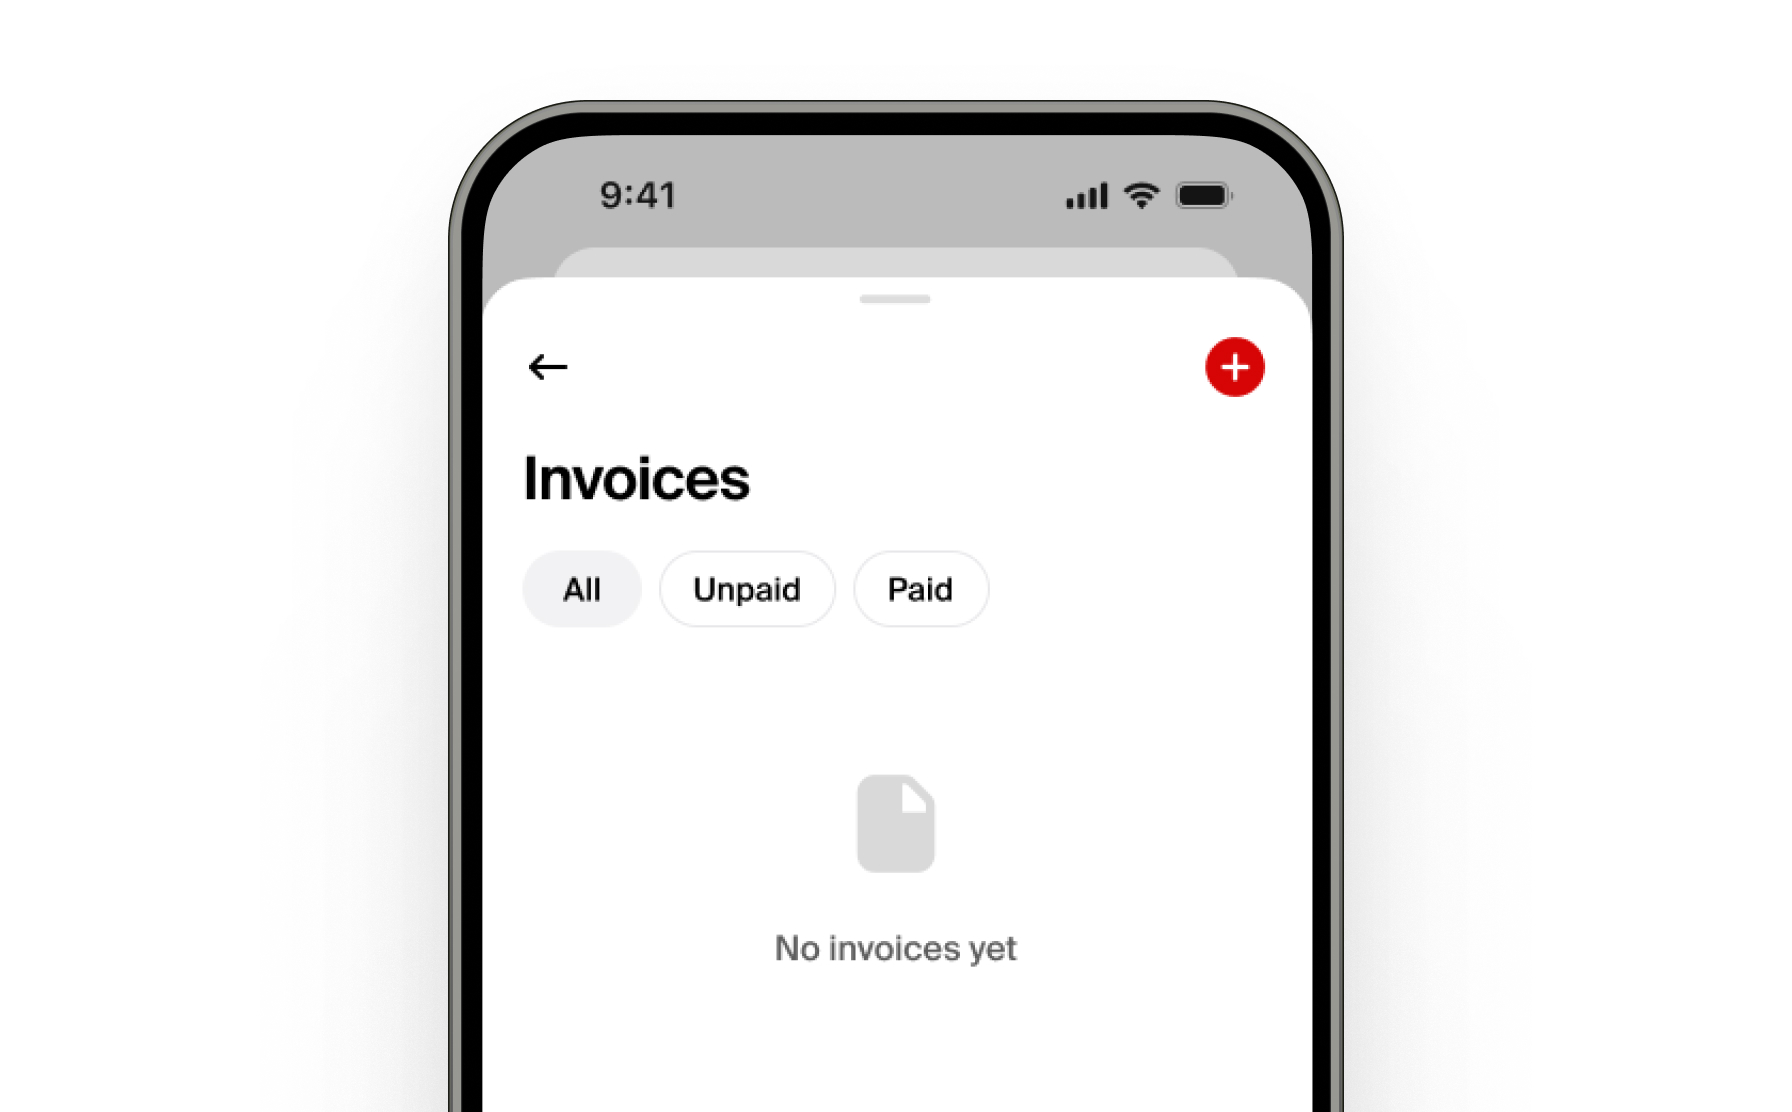
2. Create Your First Invoice
Tap the red plus (+) icon in the top-right corner to create your first invoice.
3. Enter Client Details
Enter your client’s name and address.
Note: Your own name and address will be automatically filled in using your nsave account details.

4. Add Invoice Items
Enter your first line item:
- Add a clear description
- Set the quantity or amount
- Enter the price
Tip: Press Add item to include additional line items.
5. Add Tax Information
Select the tax situation that applies to you and add the appropriate tax to the invoice.
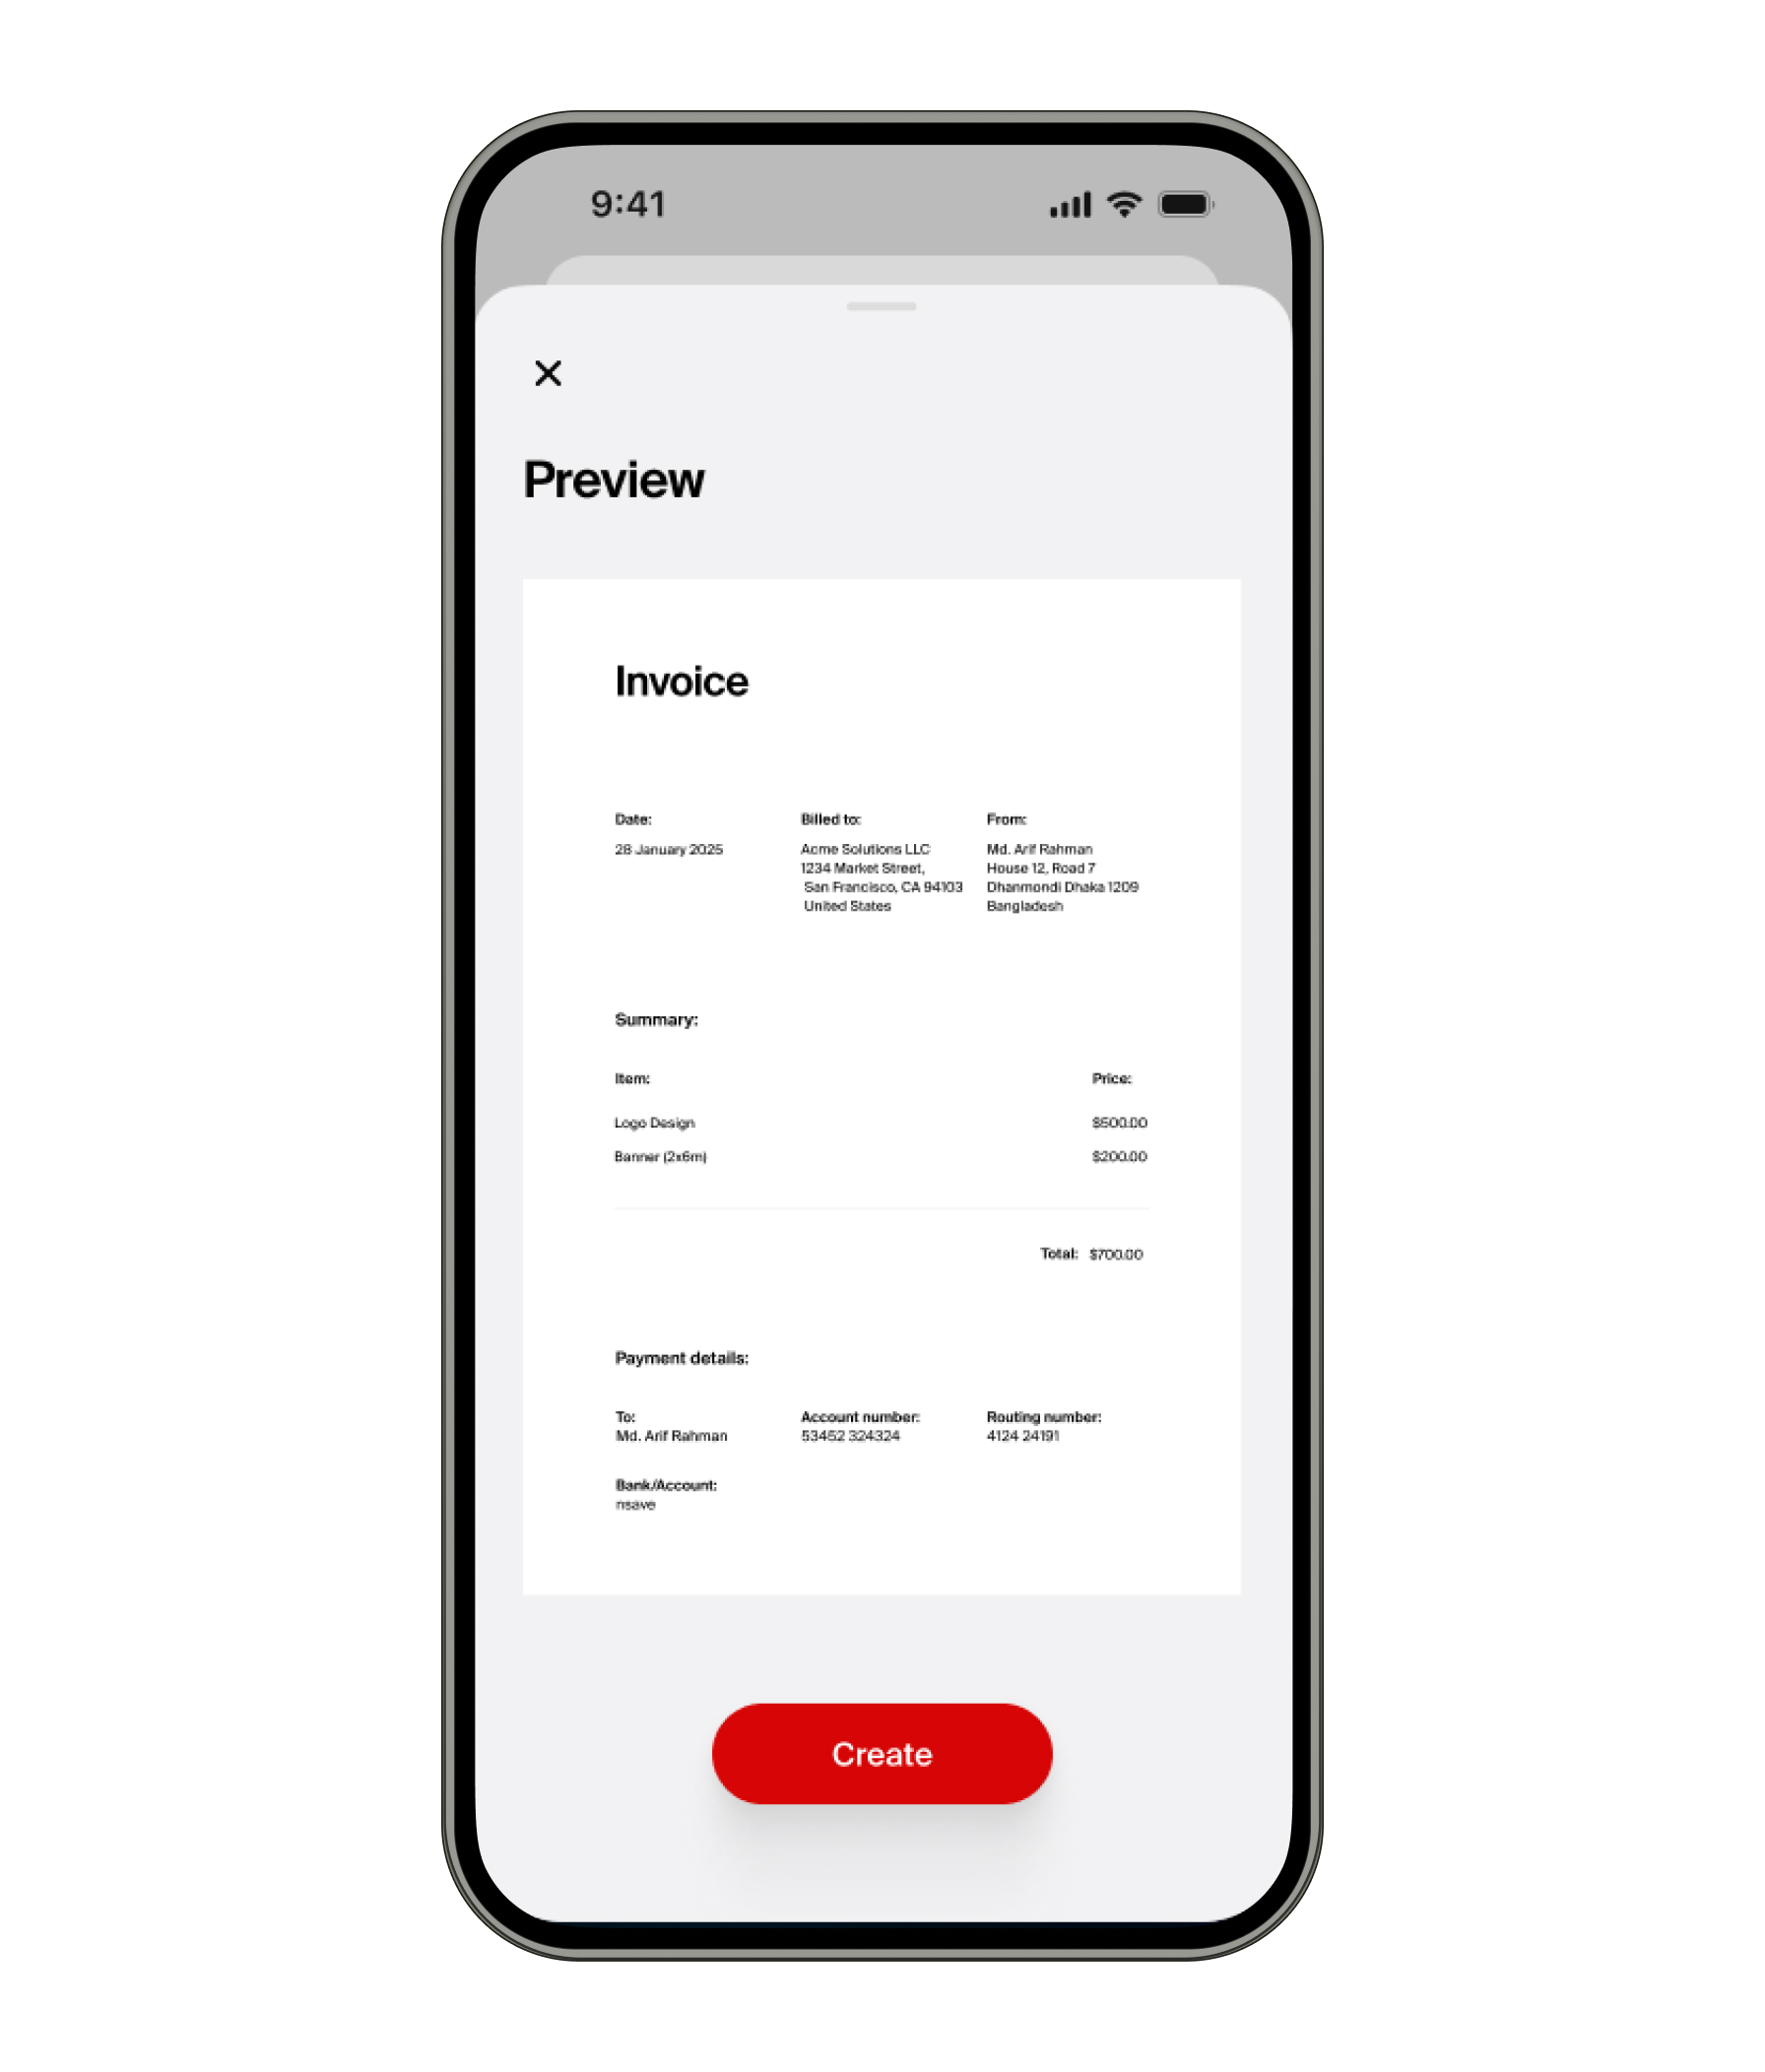
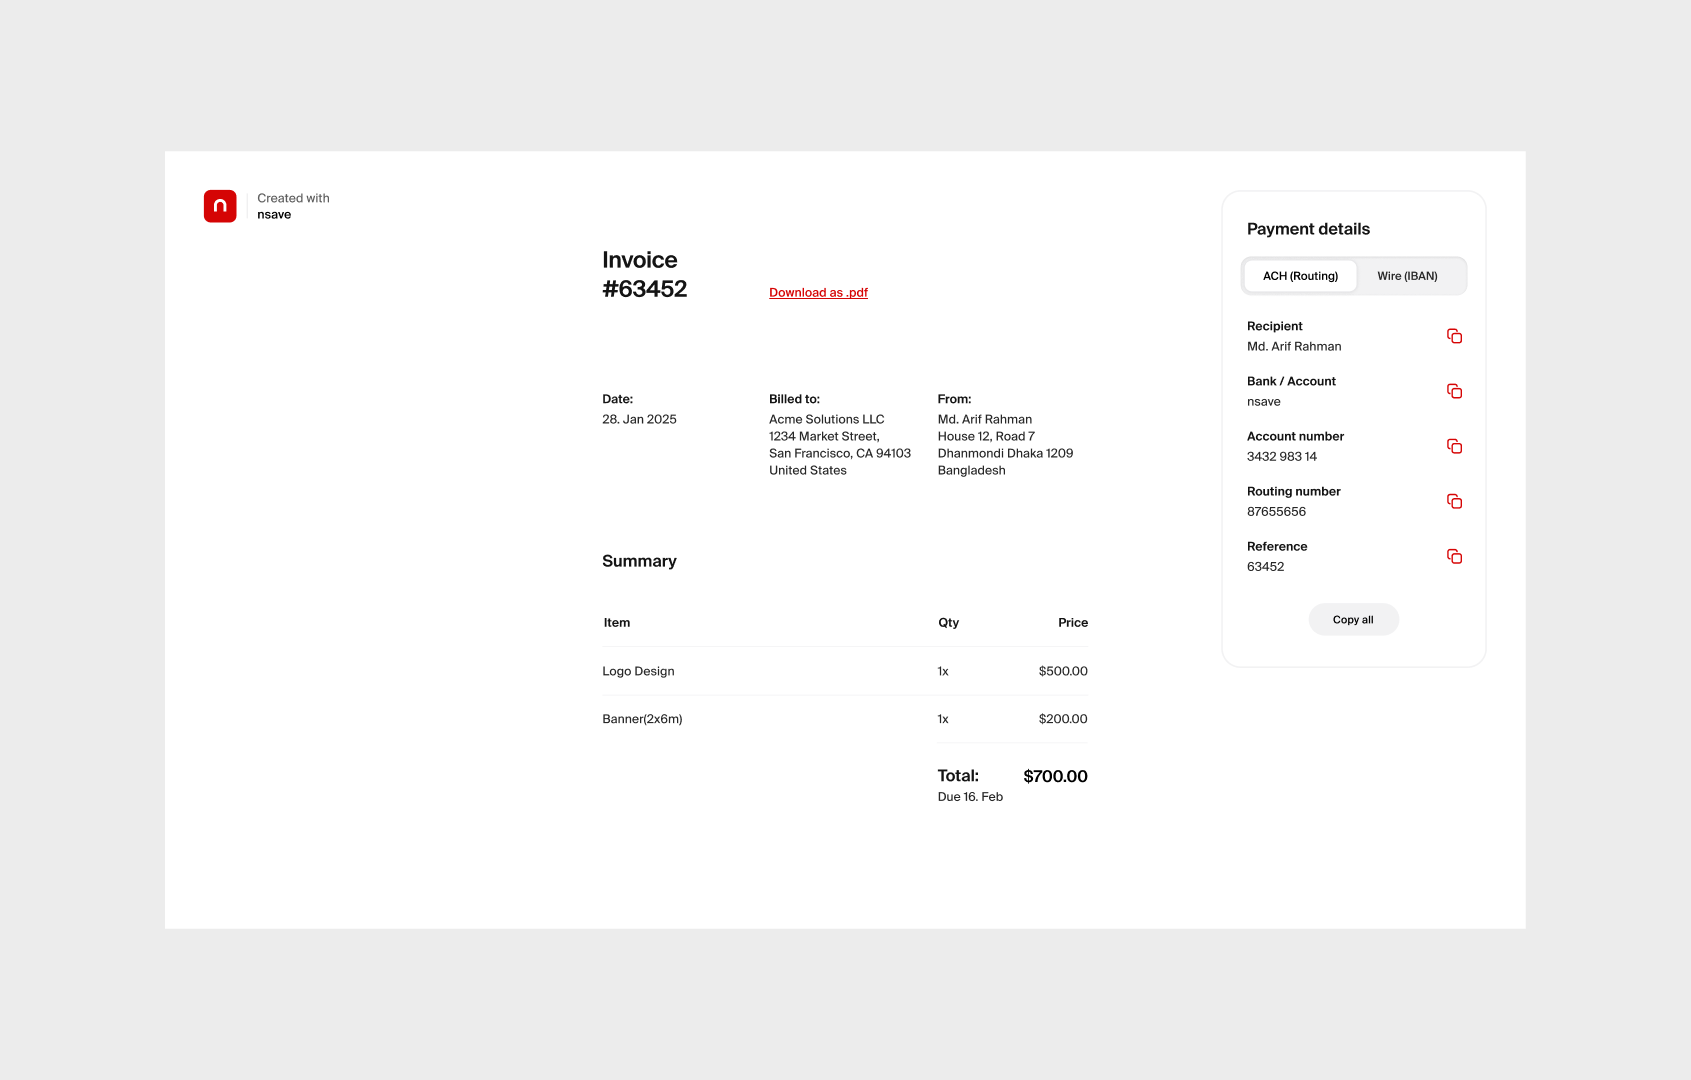
6. Review Your Invoice
Press Review to preview how your invoice will look.
Note:
- The invoice will automatically include your USD ACH account details.
- If ACH details are not available but wire details are, those will appear instead.
7. Create and Share the Invoice
Press Create.
This will:
- Generate a downloadable PDF
- Create a secure invoice payment link you can share with your client
You can send the link via email, WhatsApp, or any other preferred method.
Note:
The payment link includes default payment instructions. You can edit or remove this wording before sending.
8. Client Opens the Payment Link
When your client opens the link, they will see a professional invoice together with the relevant payment details.
9. (Optional) Mark the Invoice as Paid
Once you’ve received payment:
- Go to your invoice overview
- Mark the invoice as Paid
This helps you keep accurate track of your billing and finances.
You're All Set
You can now create compliant invoices and share secure payment links directly from the nsave app, helping you get paid faster and stay organized.